

The Connecticut Raised Bed Vegetable Garden Pillar — Every Vegetable, Every Variety, Every Decision
Build the bed, fill it right, and grow exactly what's worth growing in CT — with the specific varieties that actually perform here, sourced from UConn Extension and three decades of Fairfield County delivery experience.
Quick Navigation
Every spring we get the same call. Someone built a beautiful cedar raised bed over the weekend, ran to the garden center, did the math on bags of "raised bed soil," and discovered it would cost more than the bed itself. So they call us. And the truth is, if you're filling anything bigger than one small bed, bulk is the only option that makes financial sense — and the right bulk soil gets better results than the bagged products anyway.
This is the deep guide. It covers everything from filling your first bed to picking the exact tomato varieties that perform in Fairfield County's humidity, with the specific cultivars UConn Extension recommends for Connecticut conditions. Use the quick navigation above to jump to any section, or read it through and you'll have everything you need to build, plant, and harvest a serious vegetable garden in the Northeast.
If you'd rather just call us with your bed dimensions, that works too — (203) 877-5070.
Why Raised Beds, Why Now
Connecticut soil is generally not great for vegetables. Most of Fairfield County and New Haven County sits on glacial till — a sandy-rocky base topped with whatever organic horizon survived the last ice age and 300 years of farming. Coastal towns like Westport, Fairfield, and Madison have sandier soils. Inland towns like Trumbull, Monroe, and Wilton have heavier soils with more rock. Both extremes have problems for vegetables. Drainage is uneven, the pH usually runs acidic from generations of pine and oak leaf fall, and the topsoil layer in most residential lots is thin where it hasn't been disturbed by construction.
A raised bed sidesteps all of that. You're starting fresh — a controlled environment where you choose the soil, the depth, the drainage, the amendments. The first season you plant in a properly filled raised bed, you'll understand why people get hooked on this kind of gardening. The yields are dramatically better than struggling in-ground.
The catch is that the soil makes or breaks the whole project. If you get the soil right, the rest of the gardening year is easy. If you get it wrong — and most first-timers do — you'll spend three months wondering why nothing's growing.
The Cost Reality: Bags vs. Bulk
Let's do the math, because this is where most first-time gardeners get stuck. A standard 4-foot by 8-foot raised bed at 12 inches deep needs 32 cubic feet of soil. That's about 1.2 cubic yards.
| Source | What it costs | To fill one 4×8×12" bed |
|---|---|---|
| Bagged "raised bed soil" at the big box store | ~$8–12 per 1.5 cu. ft. bag | 21 bags × $10 = ~$210 + your time hauling |
| Bagged premium organic mix | ~$14–18 per 1.5 cu. ft. bag | 21 bags × $16 = ~$335 |
| Bulk garden mix delivered (Grillo) | $48 per cubic yard + delivery | ~$58 in material + town delivery rate |
Bulk is anywhere from 3× to 6× cheaper. And for any project bigger than a single small bed, the difference becomes punishing. Three 4×8 beds is roughly 3.6 cubic yards — that's $630 in bagged soil, versus about $173 in bulk garden mix plus delivery.
Money-Saving Tip
If you're filling beds deeper than 12 inches and you have the depth to spare, you don't need premium garden mix all the way to the bottom. Fill the lower third with our screened compost or a layer of decomposing wood, and top with garden mix for the active root zone. Plants do their work in the top 8–12 inches — anything deeper is just structural support.
What Actually Goes in a Raised Bed
You'll find a hundred different "perfect" soil recipes online. Mel's Mix (equal parts peat, vermiculite, compost) is the most famous. It's a fine recipe for very small beds filled with bagged components. But for anything you're filling with bulk material, it's the wrong starting point — too expensive, too light, settles aggressively.
The real-world bulk-supplier recipe for a productive vegetable bed is simpler: quality screened topsoil, finished compost, and an organic amendment for drainage and nutrition.
Option 1: Garden Mix — The Easy Button
Our Organic Garden Mix is a 50/50 blend of screened topsoil and screened compost, pre-mixed with 9-0-5 organic slow-release fertilizer. It's the product we developed specifically because most homeowners want a vegetable garden but don't want to mix three or four different bulk materials in their driveway. At $48 per cubic yard, it's the most cost-effective option for most homeowners building their first one to three raised beds.
Option 2: Custom Blend — When You Want Total Control
If you've been gardening for years and have an opinion about what your bed should contain, we can custom blend any bulk products at our yard before delivery. No mixing fee. You pay the normal per-yard price for each material in the blend.
- Heavy-feeder blend — garden mix + extra compost (for tomatoes, peppers, squash, cucumbers)
- Acid-loving blend — garden mix + peat moss (for blueberries, strawberries, brassicas)
- Drainage-amended blend — garden mix + coarse sand (for root vegetables on heavy soil, or beds in low spots)
- Berry bush blend — Eco Soil + compost + pine bark mulch (drainage plus slow-release organic matter)
Custom blends are phone orders only — call (203) 877-5070.
Option 3: Mix Your Own
If you'd rather buy the components separately and mix them yourself in the bed, the classic recipe is 50% screened topsoil, 40% screened compost, 10% peat moss or coarse sand. This works fine and lets you tune the ratios bed-by-bed. The downside is you're getting multiple deliveries (or one split-load with a $20 fee, up to 4 yards combined).
What NOT to Use
Don't use potting soil. Too light, settles dramatically, dries out fast. Use it for containers and seed-starting trays.
Don't use straight topsoil. Plain topsoil without compost lacks the nutrient profile for heavy-feeding vegetables.
Don't fill the bottom with rocks "for drainage." A persistent gardening myth. Rocks create a perched water table that actually makes drainage worse. Just use soil top to bottom.
Skip the Decision Fatigue — Order Garden Mix
Pre-blended 50/50 topsoil and screened compost with 9-0-5 organic fertilizer already mixed in. The product we made specifically for filling raised vegetable beds in Connecticut. $48/yard delivered.
Order Garden Mix Browse CompostHow Much Soil Do You Need?
Formula: length × width × depth (all in feet) ÷ 27 = cubic yards. Quick reference at 12 inches deep:
| Bed dimensions | Cubic feet | Cubic yards |
|---|---|---|
| 4 × 4 × 12" | 16 | ~0.6 |
| 4 × 8 × 12" | 32 | ~1.2 |
| 4 × 8 × 18" | 48 | ~1.8 |
| 4 × 12 × 12" | 48 | ~1.8 |
| Two 4 × 8 × 12" beds | 64 | ~2.4 |
| Three 4 × 8 × 12" beds | 96 | ~3.6 |
Order about 15% more than the math says you need — soil settles 10–20% in the first season. A 6-wheel dump truck delivers up to 8 yards of garden mix per load.
Filling the Bed — Step by Step
1. Site the Bed
Vegetables need at least 6 hours of direct sunlight, ideally 8 or more. Morning sun is better than afternoon — dries dew off leaves, reduces disease pressure. Avoid spots under downspouts or low points where water collects. Give yourself a hose connection within reach.
2. Prep the Ground Underneath
Cardboard method — Lay flattened cardboard or several layers of newspaper over the grass before placing the bed frame. The cardboard smothers the grass and decomposes within a season. Plant roots grow right through it.
Strip method — Strip the sod out first with a flat shovel before placing the frame. Compost the sod out of the way.
Either way, before filling, loosen the top 6–8 inches of subsoil with a garden fork. Don't flip the soil — just drive the fork in and rock it back and forth. This breaks compaction so roots can reach deeper moisture in dry summer stretches.
3. Fill
The delivery truck dumps your garden mix on the driveway. A standard contractor wheelbarrow holds about 6 cubic feet, but heavy wet soil rarely fills it to the brim — figure 6–8 wheelbarrow trips per cubic yard. Fill the bed to within an inch or two of the top, not flush. The soil settles over the first few weeks.
Don't compact it as you fill. Walking on the bed or pressing the soil down with a rake defeats the whole point of raised beds.
The Connecticut Vegetable Planting Calendar
Timing matters more than almost anything else. Connecticut's last spring frost typically falls between May 10–15 in coastal towns (Fairfield, Westport, Stamford, Madison) and May 15–25 inland (Trumbull, Monroe, Ridgefield, Easton). First fall frost arrives around October 5–15 inland and October 15–25 along the coast. That gives most CT gardens a growing season of roughly 150–180 days.
| When | What to plant | How |
|---|---|---|
| Early April | Peas, spinach, lettuce, arugula, radishes, kale | Direct seed as soon as soil is workable |
| Mid-April | Carrots, beets, Swiss chard, onions (sets), potatoes | Direct seed / set |
| Late April / Early May | Broccoli, cabbage, cauliflower, Brussels sprouts | Transplants only |
| Mid-May (after last frost) | Tomatoes, peppers, eggplant | Transplants — wait for warm soil |
| Late May / Memorial Day | Cucumbers, summer squash, zucchini, beans, basil, melons | Direct seed or transplants |
| June | Winter squash, pumpkins, sweet potatoes | Transplants / direct seed |
| July | Second round of bush beans, carrots, beets | Succession planting |
| August | Fall lettuce, spinach, arugula, kale, radishes | Direct seed for fall harvest |
| September | Garlic (for next year) | Plant cloves before first frost |
The biggest first-year mistake is planting warm-season crops (tomatoes, peppers, basil) too early. A late-April warm spell that has everyone at the garden center is followed by a hard frost in early May more often than people remember. Wait for soil temperature to reach 60°F at 4 inches deep before planting tomatoes and peppers — that's typically Mother's Day weekend at the earliest, Memorial Day for inland gardens.
The Vegetable Deep Dives
Sixteen vegetables (plus herbs) that grow well in Connecticut raised beds. Each section covers UConn Extension-recommended varieties, planting timing, spacing, common problems, and harvest notes. The variety recommendations come directly from UConn's home garden fact sheets — these are cultivars that have been tested and proven in CT conditions.
🍅 Tomatoes
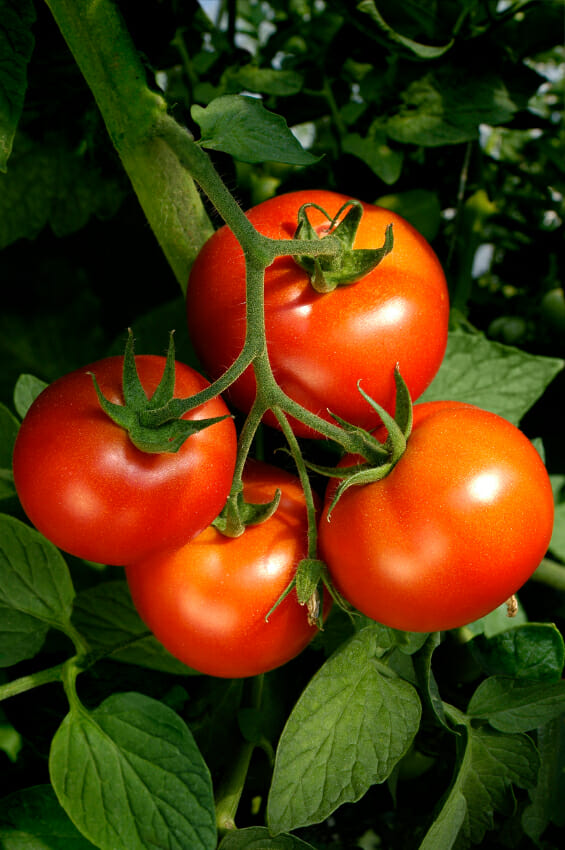
The most-grown vegetable in Connecticut, and the one most likely to disappoint a first-time gardener. Tomatoes are heavy feeders, need warm soil, are vulnerable to a handful of fungal diseases that thrive in CT humidity, and demand consistent watering. Get them right and you'll have more than you know what to do with.
Determinate vs. Indeterminate — Pick the Right Type
Determinate tomatoes grow to a fixed size (usually 3–4 feet), set their fruit over a 2–3 week window, then stop. Good for canning, containers, smaller beds, anyone who wants the harvest concentrated. Indeterminate tomatoes keep growing and producing all season until frost — taller (6+ feet), more sprawling, need staking or caging, but produce continuously through summer. Most home gardeners want a mix of both.
Disease Resistance Codes — What the Letters Mean
Tomato varieties are often labeled with letters indicating disease resistance. These matter in Connecticut because our humid summers create perfect conditions for soil and foliar diseases:
- V — Verticillium wilt (soil fungus)
- F or F1, F2, F3 — Fusarium wilt (different races)
- N — Nematodes (microscopic root parasites)
- T — Tobacco mosaic virus
- AL — Alternaria stem canker (early blight family)
- PhR — Phytophthora (late blight tolerance)
For Connecticut, prioritize varieties with at least VF resistance. Many of the classics have it.
UConn-Recommended Varieties for Connecticut
Early Season (mature 55–70 days from transplant — for getting an early jump)
- Early Girl — Indeterminate, 50–60 days, classic CT favorite for getting the first ripe tomato of the season. 4–6 oz fruits.
- Spring Set (VF) — Determinate, productive, good disease resistance.
- Pilgrim (VF2) — Determinate, disease resistant, very reliable.
- 4th of July — Indeterminate, named for when you'll harvest your first one if you plant on time.
Midseason (70–80 days from transplant — the workhorses)
- Celebrity (VFNT) — Determinate, AAS winner, the all-around best midseason tomato for new gardeners. Disease-resistant (verticillium, fusarium, nematodes, tobacco mosaic), reliable producer, 8 oz fruits.
- Jet Star (VF) — Indeterminate, large fruits, low-acid sweet flavor, very popular in the Northeast.
- Mountain Pride (F, V) — Determinate, dependable, well-suited for CT humidity.
- Big Beef — Indeterminate, AAS winner, excellent disease package (alternaria, fusarium, gray leaf spot, verticillium, tobacco mosaic, nematodes). 10–12 oz fruits.
Late Season / Beefsteak (80–90 days — for the big sandwich tomatoes)
- Better Boy (VFN) — Indeterminate, classic beefsteak, prolific.
- Brandywine — Indeterminate, heirloom, legendary flavor, larger fruits but slower and less disease-resistant.
- Supersonic (VF) — Indeterminate, big slicer, well-adapted to CT.
- Ramapo (VF) — Rutgers-bred classic, indeterminate, the Jersey beefsteak flavor.
- Galahad — A newer disease-resistant Brandywine alternative with excellent flavor and a much stronger resistance package.
Cherry & Grape
- Sun Gold — Indeterminate, the most-recommended cherry in the Northeast. Orange, exceptionally sweet, prolific. Cracks if watering is irregular, but worth growing every year.
- Sweet 100 / Sweet Million — Indeterminate, classic red cherry, reliable.
- Sweet Chelsea — Cherry, disease resistant, larger fruits than typical cherries.
- Juliet — Indeterminate, grape-shape, resistant to late blight, holds well on the vine.
Paste / Plum (for sauce, canning, cooking)
- Roma (VF) — Determinate, classic paste tomato.
- San Marzano — Indeterminate, the Italian sauce tomato. Better flavor, more vigorous, less compact than Roma.
- Amish Paste — Indeterminate heirloom, large paste tomatoes, excellent for canning.
- Plum Dandy — Determinate, fusarium-resistant.
Planting and Spacing
Plant tomatoes deep — burying the stem up to the first set of true leaves. Roots will form along the buried stem, creating a much stronger plant. Space indeterminate varieties at least 24–36 inches apart. Crowded tomatoes get fungal disease. A 4×8 raised bed comfortably holds 3 plants if they're indeterminate, 4 if they're determinate or compact.
Stake or cage at planting time. Don't wait until they need it. Standard tomato cages are too short for indeterminate varieties — use 6-foot stakes or build a sturdier cage from concrete reinforcing wire.
Common Connecticut Problems
Early blight — Brown spots with concentric rings on lower leaves. Most common foliar disease in CT. Mulch heavily to prevent spore splash, prune the lowest leaves so nothing touches soil, water at the base, never overhead.
Late blight — Catastrophic disease, often wipes out unprotected plants in a single week. Greasy gray-brown patches on leaves and stems, white fuzz underneath. Plant resistant varieties (Defiant, Mountain Magic, Iron Lady) in years with wet summers.
Septoria leaf spot — Tiny brown spots with yellow halos on lower leaves. Treat like early blight.
Blossom end rot — Dark, sunken bottom on fruit. Caused by calcium not reaching the developing fruit — almost always a watering problem, not a soil-calcium deficiency. Mulch and water consistently to fix it.
Cracking — Fruits split, especially after rain following a dry spell. Mulch heavily and water consistently to even out moisture.
Harvest
Pick tomatoes when they're fully colored but still firm. Vine-ripened beats supermarket every time, but a tomato picked at "breaker" stage (first hint of color) and finished on the counter is nearly as good and avoids losing them to splits, squirrels, or critters. Twist gently — don't pull or you'll snap the stem.
↑ Back to top🌶️ Peppers
The companion to tomatoes — same growing conditions, same beds, similar timing. Peppers are slightly more finicky about cool weather (they sulk below 65°F) but otherwise easier than tomatoes. CT gardens can grow excellent sweet peppers and hot peppers from late June through first frost.
Recommended Varieties for Connecticut
Sweet Bell Peppers
- California Wonder — Classic blocky 4-lobed green-to-red bell. Reliable, the standard for a reason.
- King Arthur — Hybrid, large blocky bells, ripens to deep red, good disease tolerance.
- Lady Bell — Compact plant, large fruits, good for raised beds.
- Carmen — Italian-style elongated bull's-horn shape, sweet, ripens early. AAS winner.
- Lipstick — Heart-shaped, very sweet, ripens red, productive in CT short seasons.
Sweet Specialty Peppers
- Banana / Sweet Banana — Long thin yellow peppers, mild, productive.
- Cubanelle — Italian frying pepper, mild, light green.
- Shishito — Small Japanese frying pepper, blistered in oil. Trendy and easy to grow.
- Padrón — Spanish small peppers, mild most of the time but one in twenty is hot — the surprise is the point.
Hot Peppers
- Jalapeño M — The classic Mexican jalapeño, productive, ripens green to red.
- Cayenne — Long thin red, for drying and powder.
- Serrano — Hotter than jalapeño, smaller fruits, very productive.
- Habanero (orange or red) — Serious heat, fruity flavor, requires a long warm season. Plant against a sunny south-facing wall.
- Poblano / Ancho — Mild-to-medium, dark green ripening to brown-red. Essential for stuffed peppers and Mexican cooking.
- Hungarian Hot Wax — Yellow, productive, moderate heat.
Planting and Spacing
Don't rush peppers into the ground. They genuinely don't grow until soil temperature is 65°F at 4 inches. Plant a week later than your tomatoes — Memorial Day weekend is right for inland CT. Space 18–24 inches apart. Peppers benefit from light staking once they start setting fruit; the branches snap easily in summer thunderstorms when loaded.
Common Problems
Slow start in cold soil — If the early forecast looks chilly, hold the transplants in the garage and put them out a week later. Cold-stressed peppers stay stunted all season.
Sunscald — White or papery patches on the side of the fruit facing the sun, especially after pruning. Don't strip the leaves off the upper plant.
Blossom drop — Hot weather (above 90°F) or cold nights cause flowers to fall without setting fruit. Wait it out — production resumes when weather moderates.
Harvest
Green peppers can be picked anytime they're firm and full-sized. Letting them ripen fully on the plant to red, yellow, or orange gives much sweeter, more vitamin-rich fruit — but the plant produces less because it's putting energy into ripening rather than new flowers. The trade-off is yours.
↑ Back to top🥒 Cucumbers
The most productive single vegetable you can plant in a CT garden. One or two plants on a trellis produces more cucumbers than a family of four can eat. Cucumbers are also one of the easiest first crops — fast to germinate, quick to mature, dramatic results.
Slicers, Picklers, or Specialty?
Pick the type based on what you want to do with them. Slicers are the long smooth cucumbers you eat fresh. Picklers are shorter, bumpier, firmer-fleshed, designed to hold up in jars. Specialty includes Asian, Middle Eastern, lemon, and burpless types — usually with thinner skin and sweeter flavor.
Recommended Varieties for Connecticut
Slicing Cucumbers
- Marketmore 76 — The standard slicer in the Northeast, productive, disease resistant.
- Straight Eight — AAS winner, classic 8-inch slicers, very reliable.
- Diva — Burpless, thin-skinned, parthenocarpic (sets fruit without pollination — useful when bee activity is low). AAS winner.
- Sweet Slice — Long, mild, very sweet.
Pickling Cucumbers
- Boston Pickling — Classic pickler heirloom, productive.
- Bush Pickle — Compact, good for smaller beds.
- National Pickling — Reliable, productive, the right size for jars.
Specialty
- Lemon Cucumber — Round yellow fruits the size of a lemon, mild and crunchy, kids love them.
- Armenian — Long, ribbed, technically a melon but eaten as a cucumber, never bitter.
- Suyo Long — Japanese type, long and ridged, sweet flavor.
- Beit Alpha / Persian — Smooth, thin-skinned, sweet, no need to peel.
Trellis or Sprawl?
Always trellis. Cucumbers on a trellis take a fraction of the space, get better air circulation (less powdery mildew), produce straighter fruit, and are easier to harvest. A 6-foot tall trellis along the back of a 4×8 bed lets you grow 2–3 cucumber plants without giving up bed space for the rest of your garden. Use cattle panel, sturdy netting, or simple stake-and-string structures.
Common Problems
Cucumber beetles — Striped or spotted small yellow beetles. Damage the foliage but more importantly transmit bacterial wilt, which kills plants overnight. Row covers at planting are the best prevention — remove when flowers appear.
Powdery mildew — White powder on leaves, late summer. Plant resistant varieties (Marketmore, Diva), thin foliage for air circulation, avoid overhead watering.
Downy mildew — Yellow patches on top of leaves, gray-purple fuzz underneath. UConn recommends downy-mildew-resistant varieties (DM resistance) in CT because of regional pressure.
Bitter cucumbers — Caused by stress, usually heat or drought. Keep soil consistently moist with mulch.
Harvest
Pick early and often. Cucumbers get bitter and woody when they over-ripen on the vine, and an over-mature cucumber tells the plant to stop producing flowers. Slicers at 6–8 inches, picklers at 3–5 inches. Check the trellis every other day during peak season — they go from "perfect" to "too big" in 48 hours in hot weather.
↑ Back to top🥒 Summer Squash & Zucchini
The most productive vegetable per plant in any garden. One healthy zucchini plant produces more squash than most families can use. The challenge isn't growing them — it's giving them away before they take over the kitchen counter.
Recommended Varieties
Zucchini
- Dunja — Open-pollinated organic, classic green zucchini, productive, good disease resistance.
- Raven — Dark green, glossy, compact bush habit, AAS winner.
- Black Beauty — Classic dark green heirloom, very productive.
- Costata Romanesco — Italian ribbed zucchini, nuttier flavor, less prolific (good if you want fewer but better).
- Magda — Pale green Lebanese-style, thicker than typical zucchini, sweet flavor.
Summer Squash (non-zucchini)
- Early Prolific Straightneck — Yellow straightneck, classic, AAS winner.
- Yellow Crookneck — Old-school heirloom, bumpy yellow with curved neck, exceptional flavor.
- Pattypan / Sunburst — Scalloped flat squash, picked small (2–3 inches) for best flavor.
- Bennings Green Tint — Pale green pattypan, mild flavor.
- Eight Ball — Round green zucchini, ideal for stuffing.
Planting and Spacing
Plant directly in the bed after Memorial Day, three seeds per hill, then thin to the strongest plant. Do not plant more than two squash plants per family unless you have a plan for the extras. A single healthy plant produces 6–10 squash per week at peak. Two is plenty. Bush varieties (Raven, Dunja) take less space than older vining types.
Common Problems
Squash bugs — Brown shield-shaped bugs, lay copper-colored eggs on undersides of leaves. Hand-pick adults early in season, scrape eggs off leaves with a fingernail. Heavy infestations kill plants.
Squash vine borer — A moth larva that bores into the stem at the base. Plants suddenly wilt at the base. Cover with row cover until first flower appears, then remove for pollination. Or grow Cucurbita moschata varieties (butternut family), which are resistant.
Powdery mildew — Inevitable in CT humidity by August. Plant resistant varieties, avoid overhead watering, accept that production tapers in late summer.
Blossom end rot — Same as tomatoes, caused by inconsistent watering. Mulch and water consistently.
Harvest
Pick small for best flavor and to keep the plant producing. Zucchini at 6–8 inches, yellow squash at 4–6 inches, pattypans at 2–3 inches. A baseball-bat-sized zucchini is a waste. Check the plant every day in July — they double in size overnight in warm weather. Squash blossoms are also edible (lightly battered and fried, or stuffed) — pick male flowers (the ones on long thin stems without a fruit behind them) to avoid sacrificing future fruit.
↑ Back to top🎃 Winter Squash & Pumpkins
Winter squash needs space — long sprawling vines, 80–110 days to maturity, 10+ square feet per plant. Not the best fit for a small raised bed, but if you have a bigger bed or can let the vines run out of the bed onto adjacent lawn, the payoff is winter-long eating from one summer's planting.
Recommended Varieties
- Butternut (Waltham) — The reliable workhorse. Tan, bell-shaped, sweet, stores 4–6 months. The first winter squash most CT gardeners should grow.
- Delicata (Honey Boat) — Cylindrical with green stripes, sweet flavor, edible skin, shorter season (90 days), fits CT season well.
- Acorn (Table Queen) — Classic acorn-shape, ribbed, dark green. Good for stuffing.
- Spaghetti — Pale yellow, flesh pulls apart in strands like pasta. Easy and fun for kids.
- Kabocha (Sunshine, Winter Sweet) — Japanese-style, sweet dense orange flesh, smaller fruits.
- Long Island Cheese — Pumpkin-shaped, cream-colored, dense orange flesh, the pumpkin to grow for pies.
- Sugar Pie — Small orange pumpkin, the classic pie variety.
Common Problems
Same pest pressure as summer squash — vine borers, squash bugs, powdery mildew. Butternut and other Cucurbita moschata varieties are mostly resistant to vine borers.
Harvest and Storage
Pick when the rind is hard enough that your fingernail can't dent it, the stem has turned woody, and the color is fully developed. Cut with a knife (leaving 2 inches of stem) — pulling damages the storage end. Cure for 7–10 days in warm sun before storing — this hardens the skin and improves storage life dramatically. Then store in a cool dry place (50–60°F is ideal). Butternut and kabocha will store 4–6 months. Acorn squash stores 1–2 months only.
↑ Back to top🫘 Beans
Beans are the easiest serious vegetable to grow in Connecticut. Direct seed, no transplants needed, produces heavily, fixes nitrogen back into the soil. Two types: bush beans (compact, harvest concentrated over 2–3 weeks) and pole beans (climbing, produce all season until frost).
Recommended Varieties
Bush Snap Beans (green beans)
- Provider — The standard CT bush bean. Reliable, cold-tolerant (germinates in cooler soil), productive, disease resistant.
- Bush Blue Lake — Classic flavor, productive, the bean most people think of when they think "green bean."
- Maxibel — Filet (haricot vert) style, thin and tender, picked young.
- Royalty Purple Pod — Purple beans that turn green when cooked, easy to spot for harvest.
- Gold Rush / Roc d'Or — Yellow wax beans, mild flavor.
Pole Snap Beans
- Kentucky Wonder — The classic American pole bean. Vigorous, productive, good flavor.
- Blue Lake (pole) — Same flavor as the bush version, vining habit, longer production.
- Romano — Italian flat-pod beans, exceptional flavor.
- Emerite — French filet-style pole bean, thin tender pods.
- Rattlesnake — Mottled purple-and-green pods, heat tolerant, productive.
Dry / Shell Beans
- Vermont Cranberry — Heritage New England bean, beautiful mottled red-and-white shell beans.
- Black Turtle — Classic black bean for soups, easy to grow.
- Jacob's Cattle — Heirloom New England dry bean, beautiful coloring.
Planting and Spacing
Direct seed after the soil reaches 60°F — usually mid-May along the coast, Memorial Day inland. Plant 1 inch deep, 4–6 inches apart in rows 18–24 inches apart. Don't soak the seeds before planting — bean seeds split easily when pre-soaked. For pole beans, set up the trellis or poles before planting.
Bush beans produce in a concentrated 2–3 week window. Plant successively (every 2 weeks through mid-July) for continuous harvest. Pole beans produce all summer until frost from one planting.
Common Problems
Mexican bean beetle — Yellow ladybug-shaped beetle, eats holes in leaves. Hand-pick adults, scrape eggs off undersides of leaves.
Bean rust — Reddish-brown spots on leaves, late season. Mulch to prevent splash, water at the base.
Cool wet soil — Beans planted too early rot in the ground before germinating. Wait for warm soil.
Harvest
Pick snap beans when pods are pencil-thick and the beans inside haven't started to swell visibly. Harvest every other day during peak production — over-mature pods get fibrous, and once a bean plant has mature pods, it slows new flowering. Dry beans stay on the plant until pods are completely dry and rattle when shaken, then shell.
↑ Back to top🌱 Peas
The first thing to plant every spring. Peas like cool weather — they germinate in cold soil, grow vigorously in April and May, and finish before summer heat shuts them down. Plant as soon as the soil is workable in early April.
Recommended Varieties
Snap Peas (eat whole pod and peas inside)
- Sugar Snap — The original snap pea, AAS winner, tall vining variety (5–6 feet), needs trellis.
- Super Sugar Snap — Improved version, more disease resistant.
- Sugar Ann — Shorter (2–3 feet), no trellis needed, productive.
Snow Peas (flat pods, eat the whole thing)
- Oregon Sugar Pod II — Compact (2½ feet), heavy producer, the classic snow pea.
- Mammoth Melting Sugar — Tall vining, very large pods.
Shelling Peas (English peas — shell and eat the peas inside)
- Lincoln — Heirloom, sweet, productive.
- Green Arrow — Productive, long pods, freezes well.
- Maestro — Disease resistant, holds well on the vine.
Planting and Spacing
Direct seed in early April — anytime the soil is workable and not frozen. Peas can tolerate light frost and grow vigorously in cool weather. Plant 1 inch deep, 2–3 inches apart along the base of a trellis. Most varieties produce best with support. Inoculate seeds with pea/bean nitrogen-fixing bacteria (sold inexpensively at any garden center) for better yields.
Common Problems
Warm weather — Peas stop producing when temperatures hit consistent 80s. Plant as early as possible to get the full harvest before summer.
Powdery mildew — Late-season problem on peas that hang on into June. Pull the plants once production stops.
Birds — Crows and jays pull pea sprouts out of the soil. Cover with row cover until plants are 4 inches tall.
Harvest
Snap peas at pencil-thickness, pods bright green and crisp. Snow peas when pods are flat and full-sized but before the peas inside swell. Shelling peas when pods are plump but still bright green — taste one to check sweetness. Pick every other day during peak — production accelerates dramatically once started.
↑ Back to top🥬 Lettuce & Greens
The fastest crop to harvest in a raised bed, and the one that gives you the most reward per square foot. Plant in early April for spring harvests, and again in late August for a fall crop. The window in between is too hot — lettuce bolts (sends up a flower stalk) once temperatures hit consistent 80s.
Recommended Varieties
Loose-Leaf (cut-and-come-again — pick outer leaves, plant keeps producing)
- Black Seeded Simpson — The classic heirloom green leaf, fast, easy.
- Red Sails — Red-tinted loose leaf, AAS winner, slow to bolt.
- Salad Bowl (green and red) — Oak-leaf shaped, productive.
- Lolla Rossa — Frilly red, beautiful, mild flavor.
Romaine
- Parris Island — Classic crisp romaine, the standard.
- Little Gem — Mini romaine, the size of a fist, sweet and crisp.
- Jericho — Heat-tolerant romaine, the best variety for late-spring harvests.
Butterhead (Boston / Bibb)
- Buttercrunch — AAS winner, tender, sweet, the standard butterhead.
- Tom Thumb — Mini heads the size of a baseball, perfect for small beds.
- Red Cross — Red-tinted butterhead, beautiful and tasty.
Other Greens (plant with lettuce)
- Arugula (Astro, Rocket) — Spicy, fast, ready in 30 days. Bolts even faster than lettuce — plant successively.
- Mâche / Corn Salad — Mild, cold-hardy, plant in fall for spring harvest.
- Mizuna — Japanese mustard green, mild peppery flavor, frilly leaves.
- Mesclun mix — Pre-mixed packet of various lettuces and greens. Easy way to start.
Planting and Spacing
Direct seed by sprinkling lightly over a smooth bed surface, then just press the seeds into the surface or barely cover with 1/8" of soil. Lettuce seeds need light to germinate, so don't bury them deep. Thin to spacing after sprouts emerge. For continuous harvest, plant a new patch every 2–3 weeks from early April through late May, and again from late August through September.
Common Problems
Bolting — Once heat hits, lettuce sends up a flower stalk and the leaves turn bitter. Plant heat-tolerant varieties (Jericho, slow-bolt types) and harvest aggressively before bolt.
Slugs — Major problem on lettuce. Mulch lightly with crushed eggshells around plants, or use iron phosphate slug bait (organic, pet-safe).
Aphids — Cluster on undersides of leaves. Spray off with water, or use insecticidal soap.
Harvest
For loose-leaf, pick outer leaves once they're 4 inches long. Leave the center growing point intact and the plant keeps producing for weeks. For head types, harvest the whole head when mature. Pick in the morning when leaves are coolest and crispest. Refrigerate immediately in a damp towel inside a plastic bag — lettuce lasts a week or more this way.
↑ Back to top🥬 Spinach
Even more cold-hardy than lettuce — spinach germinates in 40°F soil and shrugs off light frosts. Plant in late March or early April, again in late August. Like lettuce, it bolts in summer heat and isn't a midsummer crop in Connecticut.
Recommended Varieties
- Bloomsdale Long Standing — Heirloom, savoyed (crinkled) dark leaves, the classic.
- Tyee — Hybrid, semi-savoy, slower to bolt than Bloomsdale.
- Space — Smooth-leaf, fast, productive, good for spring or fall.
- Renegade — Dark green smooth leaf, downy-mildew resistant, slow to bolt.
- Malabar Spinach — Not true spinach but a heat-loving substitute for summer. Climbing vine, glossy thick leaves, mild flavor when cooked.
Common Problems
Bolting — Spinach is the first to bolt in spring heat. Harvest by mid-June at the latest in CT.
Downy mildew — Yellow patches on top of leaves, gray fuzz underneath. Plant resistant varieties (Renegade) and space for airflow.
Leaf miners — Larvae tunnel inside leaves, leaving tan trails. Pick and destroy affected leaves; use row cover early in the season.
Harvest
Pick outer leaves once they're 3–4 inches long. Like lettuce, the plant keeps producing if you leave the center growing point. Or cut the whole plant at the base. Wash and refrigerate immediately — spinach wilts fast.
↑ Back to top🥕 Carrots
Raised beds with loose garden mix are perfect for carrots — the loose soil lets roots grow straight and long without forking against rocks. CT's heavier in-ground soils often produce stubby forked carrots; raised beds solve that.
Recommended Varieties
Standard Orange
- Nantes (and varieties: Bolero, Nelson) — Cylindrical, sweet, the best flavor for fresh eating. Bolero is the workhorse.
- Danvers Half Long — Heirloom, stockier, classic carrot flavor, good storage.
- Scarlet Nantes — Sweet, productive, holds well in the ground.
- Yaya — Hybrid Nantes type, extremely sweet, productive.
Specialty
- Cosmic Purple — Purple exterior, orange interior, mild flavor.
- Atomic Red — Red carrots, sweetens with cooking.
- Yellowstone — Bright yellow, mild and sweet.
- White Satin — Mild, sweet, white roots.
- Rainbow Mix — Plant all the colors together for variety.
Mini / Round (good for shallow beds)
- Parisian / Romeo — Round French carrots the size of a golf ball.
- Little Finger — Tiny baby carrots 3 inches long.
Planting and Spacing
Carrot seeds are tiny — almost dust. Mix with sand or radish seed before planting to spread them more evenly. Plant 1/4 inch deep, water gently, and keep the seed bed consistently moist for the 10–14 days it takes to germinate. A dry surface during germination is the #1 reason for carrot failures. Thin ruthlessly once sprouts are an inch tall — crowded carrots stay tiny.
Plant succession crops every 3 weeks from mid-April through mid-July for continuous harvest from June through November.
Common Problems
Forked roots — Caused by rocks, compacted soil, or fresh manure in the planting bed. Raised beds with garden mix solve this.
Slow / failed germination — Almost always a moisture problem. Mist daily until sprouts emerge.
Carrot rust fly — Larvae tunnel into roots leaving brown trails. Cover with row cover from planting through early summer.
Harvest
Start pulling when shoulders are 1 inch across. Carrots get sweeter after the first frost — leave them in the ground through October and November for the best flavor. They store well in the ground covered with mulch through early December.
↑ Back to top⚪ Radishes
The fastest crop in the garden — ready to eat 25 days after planting. Perfect for kids' first gardening project, perfect for filling space between slower crops, perfect for spring and fall when other vegetables aren't ready yet.
Recommended Varieties
- Cherry Belle — AAS winner, classic round red, 22 days. The standard.
- French Breakfast — Oblong red with white tip, mild flavor.
- Easter Egg — Mix of red, white, purple, pink — fun to grow with kids.
- White Icicle — Long white roots, milder flavor.
- Watermelon Radish — Daikon-type, mild, green outside / pink inside, larger.
- Daikon — Long Asian radish, plant in late summer for fall harvest, used cooked or pickled.
Planting and Spacing
Direct seed 1/2 inch deep, 1 inch apart, in rows or sprinkled across a block. Thin to 1–2 inches once sprouts emerge — crowded radishes don't form bulbs. Plant successively every 1–2 weeks from early April through May, then again from late August through September.
Common Problems
Bolting — Radishes flower and turn woody if left in the ground past maturity or grown in summer heat. Harvest at peak; don't try to grow them in June or July.
Hot & pungent flavor — Caused by slow growth, dry soil, or heat. Water consistently and keep them moving fast.
Flea beetles — Tiny holes in leaves, mostly cosmetic. Row cover prevents damage.
Harvest
Pull when bulbs are the size of a quarter or marble. Leave them too long and they crack, get woody, and turn unpleasantly spicy. Pick almost daily during peak season.
↑ Back to top🟣 Beets
Two crops in one — beautiful roots below, edible greens above. Beets are reliable, productive, and a great cool-weather crop for CT raised beds. Plant in spring and again in late summer for fall harvest.
Recommended Varieties
Red Beets
- Detroit Dark Red — Heirloom standard, deep red, sweet, reliable.
- Red Ace — Hybrid, uniform shape, productive.
- Early Wonder Tall Top — Earliest variety, great greens.
Specialty
- Chioggia — Italian heirloom, candy-stripe interior (red and white rings), milder flavor than red beets.
- Golden / Touchstone Gold — Golden roots, no staining, sweeter than red beets.
- Cylindra — Long cylindrical beets, easy to slice for canning.
- Bull's Blood — Grown primarily for the deep red leaves, beautiful in salads.
Planting and Spacing
Beet "seeds" are actually clusters of several seeds — each one produces multiple sprouts. Direct seed 1/2 inch deep, 2–3 inches apart, then thin to one strong sprout per spot. The thinned greens are edible — toss them in a salad.
Common Problems
Poor germination — Soak seeds in water for a few hours before planting to soften the hull.
Stunted roots — Crowded beets stay small. Thin them.
Leaf miners — Same as spinach. Row cover prevents.
Harvest
Pull when roots are 2–3 inches across — that's peak sweetness. Beets get woody and earthy if left too long. The greens can be harvested separately throughout the growing season — pick a few outer leaves at a time. Beets store well in the fridge for 2 months, or pickled / canned indefinitely.
↑ Back to top🧅 Onions & Garlic
Long-season crops that take up bed space all year but produce serious yields. Onions go in spring, garlic goes in fall for the following summer's harvest.
Onion Varieties for Connecticut
Connecticut needs long-day or intermediate-day onions — short-day varieties (grown in southern states) won't form bulbs here.
- Walla Walla — Intermediate-day, sweet large yellow onion. Doesn't store well — use fresh.
- Yellow Sweet Spanish — Long-day, classic yellow storage onion.
- Copra — Long-day, hard yellow, the best storage onion for the Northeast.
- Red Wing — Long-day, red onion, good storage.
- Patterson — Long-day, yellow, excellent storage onion.
Garlic Varieties
Two types: hardneck (produces a flowering scape, larger cloves, better flavor, doesn't store as long) and softneck (no scape, smaller cloves, longer storage, braidable).
- German Extra Hardy — Hardneck, large cloves, excellent for CT, stores 6 months.
- Music — Hardneck, large cloves, mild but rich flavor.
- Romanian Red — Hardneck, strong garlic flavor, the choice for cooking.
- Inchelium Red — Softneck, mild, stores 8+ months.
- Silverskin — Softneck, the longest-storing variety.
Onion Planting
Plant from sets (small dry bulbs) in April for a fast crop, or from transplants for larger bulbs at season's end. Sets are easier but produce smaller onions. Push sets 1 inch into the soil, pointed end up, 4–6 inches apart.
Garlic Planting
Plant cloves in October, after the first hard frost. Break the head apart into individual cloves, plant 2 inches deep with the pointed end up, 4–6 inches apart. Mulch heavily with straw after the ground freezes. The cloves overwinter, send up green shoots in early spring, and the bulbs mature in July.
Harvest
Onions — Pull when the tops fall over and dry out in late summer. Cure in a warm dry spot for 2 weeks before storing. Garlic — Pull when the bottom 3–4 leaves have browned (usually mid-July). Cure in a shaded airy spot for 2–3 weeks. Then trim and store cool and dry.
↑ Back to top🌿 Herbs
Even a single 2×4 herb bed gives you fresh basil, parsley, thyme, oregano, and chives all summer. Herbs are easy, productive, and they pay you back disproportionately for the small space they use.
Basil
The headline herb. Plant after Memorial Day with the tomatoes — basil hates cold soil. Pinch off the top leaves regularly to keep the plant bushy; once it flowers, the leaves go bitter and production stops.
- Italian Genovese — Classic large-leaf, the basil for pesto and Caprese.
- Sweet Italian — Slightly milder, also great for cooking.
- Thai Sweet — Anise-licorice notes, for Asian cooking.
- Lemon Basil — Citrus undertone.
- Greek Basil — Small dense leaves, compact plant, very pretty.
- Rutgers DMR (Devotion, Obsession, Passion, Thunderstruck) — Downy-mildew-resistant Genovese types, recommended by UConn Extension to prevent the basil downy mildew that has wiped out garden basil across the Northeast in recent years.
Parsley
Biennial — plants the first year, flowers and dies the second. Treat as an annual in CT. Slow to germinate (3 weeks), best to start from transplants. Cold-tolerant — plant in April.
- Italian Flat-Leaf — Stronger flavor, the standard for cooking.
- Moss Curled / Curly — Decorative, milder, classic garnish.
Thyme, Oregano, Sage, Rosemary, Mint
The perennial herbs. Plant once from transplants, harvest for years. Most tolerate CT winters in raised beds. Don't over-water — these Mediterranean herbs prefer drier, well-drained soil. Rosemary is borderline winter-hardy in CT — plant against a south-facing wall, or bring it inside for winter. Mint is invasive — plant in a buried pot or its own dedicated container, never loose in a raised bed.
Chives, Cilantro, Dill
Chives are perennial and produce all season once established. Cilantro is fast and bolts in heat — succession plant every 2 weeks for continuous supply. Dill self-sows readily — plant once and you'll have it forever.
↑ Back to top🍆 Eggplant
The third member of the warm-season nightshade family (with tomatoes and peppers). Eggplant is the fussiest — needs warm soil, full sun, and a longer season than CT comfortably provides. With the right varieties and timing, you can grow excellent eggplant here.
Recommended Varieties
- Black Beauty — Classic Italian-style large purple eggplant, the standard.
- Nadia — Hybrid, productive, glossy purple, AAS winner. Probably the best for CT — earlier and more reliable than Black Beauty.
- Galine — Italian style, productive.
- Fairy Tale — Mini purple-and-white striped, AAS winner, very productive and easy.
- Hansel — Slender Asian-style, dark purple, AAS winner, productive even in shorter seasons.
- Ping Tung Long — Long thin Asian eggplant, exceptional flavor, very productive.
- Rosa Bianca — Italian heirloom, lavender-and-white, mild creamy flesh.
- Listada de Gandia — Striped purple-and-white Italian heirloom, ornamental and delicious.
Common Problems
Flea beetles — Tiny black beetles that put pinholes through the leaves, especially on young plants. Row cover until plants are flowering.
Cold-stressed plants — Eggplant transplanted into cold soil stays stunted all season. Wait for warm soil.
Verticillium wilt — Same fungal disease as tomatoes. Rotate plantings.
Harvest
Pick when fruit is glossy and firm. Dull skin means over-ripe — flesh inside will be spongy and seedy. Cut with shears — the stems are tough and you'll damage the plant trying to twist or pull.
↑ Back to top🥦 Broccoli, Cabbage & Brassicas
The cool-season heavyweights. Broccoli, cabbage, cauliflower, kale, Brussels sprouts — all members of the brassica family, all preferring cool weather, all sharing the same pest problems. Best as spring or fall crops in CT; midsummer heat shuts them down.
Broccoli
- Green Magic — Hybrid, large central head, productive, heat tolerant for CT summers.
- Belstar — Hybrid, reliable spring and fall variety.
- De Cicco — Italian heirloom, small main head but produces many side shoots over a long period.
- Calabrese — Classic Italian, smaller heads, good for early harvest.
- Romanesco — Spiral fractal heads, mild flavor, late maturing — best for fall crops.
Cauliflower
Trickier than broccoli — heads need shade from the sun to stay white. Most modern varieties are "self-blanching" with leaves that fold over the head.
- Snowball Y — Classic white, reliable.
- Cheddar — Orange head, mild flavor, AAS winner.
- Graffiti — Bright purple head, holds color when cooked lightly.
- Veronica — Spiral green Romanesco-type.
Cabbage
- Early Jersey Wakefield — Pointed-head heirloom, fast maturing.
- Stonehead — Solid heavy heads, holds well in the garden.
- Red Acre — Red cabbage, classic.
- Savoy King — Crinkled savoy leaves, beautiful and tender.
- Napa / Chinese Cabbage — Plant for fall — bolts in spring heat.
Kale
- Lacinato (Dinosaur, Tuscan) — Long dark blue-green leaves, sweet flavor, the kale for cooking.
- Winterbor — Curly kale, very cold-hardy, sweetens after frost.
- Red Russian — Tender leaves with red veins, mild flavor.
- Toscano — Italian heirloom Lacinato-type, productive.
Brussels Sprouts
Long-season — plant in May or June for October–November harvest. The sprouts taste much better after the first hard frost.
- Long Island Improved — Heirloom, reliable.
- Diablo — Hybrid, large sprouts, good for CT season length.
Common Problems
Cabbage moths / cabbage worms — Small white moths flutter around the plants and lay eggs that hatch into green caterpillars. Hand-pick worms, or spray Bt (Bacillus thuringiensis) — organic, harmless to humans, but specifically targets caterpillars.
Aphids — Cluster on growing tips. Spray with strong water blast or insecticidal soap.
Cabbage root maggot — Wilting plants with damaged roots. Row covers at planting prevent.
Heat-related bolting — Broccoli planted too late in spring shoots into flower before the head forms. Plant earlier or wait for fall.
Harvest
Broccoli — Cut the main head when buds are tight and dark green, before any yellow flowers open. Side shoots will continue producing for weeks. Cauliflower — Cut when heads are dense and full-sized. Cabbage — Cut at the base when heads are firm. Kale — Pick outer leaves, leave the center growing point. Brussels sprouts — Pick from the bottom of the stalk first; sprouts mature bottom-up.
↑ Back to topFeeding the Garden Through the Season
The garden mix gets you started, but heavy-feeding vegetables (tomatoes, peppers, squash, cucumbers, melons) need ongoing nutrition through the summer. The fertilizer in the mix is slow-release and feeds the bed for the first stretch of the season — after that, you'll want to feed the bed regularly to keep heavy producers going through July and August.
For organic feeding through the growing season, we sell Neptune's Harvest Fish & Seaweed Fertilizer in quart and gallon sizes. It's OMRI-listed, made from hydrolyzed North Atlantic fish and Ascophyllum seaweed, and it's the single product that does the most heavy lifting in a productive vegetable garden. Dilute one ounce per gallon of water, apply every 2–3 weeks during the growing season as either a soil drench or foliar spray. Safe for kids, pets, and beneficial insects. It builds natural sugars in vegetables and noticeably improves yield and shelf life.
Add-Ons Ride Free
Any bagged product — Neptune's Harvest, peat moss, grass seed, fertilizer, straw, landscape fabric — rides along free on any bulk delivery. There's no extra delivery charge for adding a few bottles of Neptune's Harvest or a bale of straw to your garden mix order. Add them to your online cart with the bulk delivery, or just mention them when you call.
Mulching the Bed
Once your transplants are in and the seedlings are up, mulch the surface of the bed. Two to three inches of mulch keeps soil moisture in, suppresses weeds, and moderates soil temperature.
For vegetable beds, the right mulches are the natural, non-dyed options:
- Sweet Peet — our premium organic mulch, partially composted, breaks down into the soil over the season and feeds the bed as it decomposes. The best choice for serious vegetable gardeners.
- Straw — classic vegetable garden mulch, light enough to push aside for planting, decomposes cleanly. Available by the bale at the yard, rides free with bulk delivery.
- Hemlock or Premium (pine-hemlock) bark mulch — fine for vegetable beds, mildly acidic, attractive appearance.
Avoid dyed mulches (walnut, brown, black, red) in vegetable beds. Not because the dye is harmful — modern dyes are non-toxic water-based colorants — but because the texture and decomposition profile of dyed mulches are designed for ornamental beds, not edible production. Save the colored mulch for the front foundation beds.
Common First-Year Mistakes
Overwatering
Raised beds drain well, but they don't drain that fast. The most common cause of dead seedlings in a new raised bed is overwatering — drowning the roots in soggy soil. Water deeply when you do water, but let the top inch dry out between waterings. Stick your finger in the soil up to the second knuckle. If it's damp, don't water yet.
Underwatering in July and August
The opposite problem hits in summer. Once temperatures hit consistent 80s, raised beds dry out fast — especially shallow beds and beds in full sun. By July you may need to water every other day, and during heat waves daily. Mulching helps enormously. If you're traveling for vacation, drip irrigation on a timer is a worthwhile investment.
Planting Too Early
In Connecticut, the last frost date is typically around May 10–15 in coastal towns and May 15–25 inland. Don't plant tomatoes, peppers, basil, or other warm-season crops before then. The soil needs to be warm, not just frost-free.
Planting Too Densely
Seed packets give you spacing for a reason. Carrot seeds that look impossibly small when you sprinkle them get crowded out and fail to size up if you don't thin them. Tomato plants spaced too close get fungal disease. Resist the urge to cram.
Ignoring pH
Most Connecticut soils are acidic — pH around 5.5 to 6.0 — which is below the ideal for most vegetables (6.0 to 7.0). Our garden mix is blended to be in the right range out of the gate, but as you add compost and amendments year over year, you'll want to check the pH every couple of seasons. A standard nutrient analysis from the UConn Soil Nutrient Analysis Lab runs about $12 and tells you exactly where you stand and what to add.
Maintaining the Bed Year After Year
Once you've filled the bed, ongoing maintenance is minimal. The annual rhythm:
Late fall, after the last harvest. Pull out the spent plants, compost them. Add 2–3 inches of fresh compost on top of the bed and let it sit through winter. The freeze-thaw cycle and earthworms will incorporate it down naturally.
Early spring. The bed has probably settled an inch or two. Top it off with another inch or two of fresh garden mix or compost. Rake smooth. Ready to plant.
During the season. Apply Neptune's Harvest every 2–3 weeks for heavy feeders. Mulch as needed. Water deeply but not too often.
A well-built raised bed gets better every year. The soil biology develops, organic matter accumulates, and your yields go up. Year three is usually noticeably better than year one — and year five is when neighbors start asking what you're doing differently.
Ready to Order Soil for Your Raised Bed?
Tell us your bed dimensions and we'll size your order in two minutes. Garden mix delivered across Fairfield and New Haven County, plus the broader CT region.
Order Garden Mix Online Call (203) 877-5070Frequently Asked Questions
How deep should my raised bed be?
Twelve inches minimum for most vegetables. Eight inches is enough for shallow-rooted crops like lettuce and herbs but limits what you can grow. Eighteen inches or deeper is excellent for tomatoes, peppers, root vegetables, and makes the bed more comfortable to work in. Beyond 24 inches, fill the bottom third with rough material (decomposing wood, leaves, screened compost) and use garden mix in the top.
Can I grow vegetables in part shade?
Leafy greens (lettuce, spinach, kale, arugula, chard, Asian greens) tolerate 4–6 hours of sun. Root vegetables (carrots, beets, radishes) need 6 hours. Fruiting vegetables (tomatoes, peppers, squash, cucumbers, beans) need 8+ hours of direct sun — they won't produce well in shade. Honest answer: if your only sunny spot gets 4 hours, focus on greens.
Should I start from seed or buy transplants?
Start with transplants your first year. They're foolproof, the timing is right, and you can focus on learning the rest of the garden. Seed-starting indoors requires grow lights, heat mats, and weeks of attention. Once you have a season under your belt, you can decide if seed-starting is for you. Some crops (carrots, beets, radishes, lettuce, beans, peas, squash, cucumbers) must be direct-seeded — they don't transplant well.
Do you deliver outside Fairfield and New Haven County?
Yes — we deliver throughout Connecticut and the broader region. For towns outside the standard rate sheet, call (203) 877-5070 for a custom delivery quote.
How much does a delivery cost?
Material price plus a town-specific delivery rate. For Fairfield County and New Haven County, the rate calculates automatically at online checkout. Most towns run between $77 (Milford) and $160 (Greenwich) for the smaller 6-wheel dump truck. Fuel surcharge adds 20% on top of the delivery rate.
Can the truck get into my driveway?
Usually yes for our 6-wheel dump trucks — they fit almost any residential driveway. Tri-axle trucks are bigger and need more room. If you have any access concerns, call before ordering and we'll figure out the right truck.
I'm a contractor — do you offer volume pricing?
For multi-yard contractor orders, recurring deliveries, or commercial relationships, call (203) 877-5070 to discuss volume and scheduling.
Is garden mix the same as topsoil?
No. Screened topsoil is the structural base — native Connecticut farm loam, screened to half-inch, CT DOT approved, about 12% organic content. Topsoil is for lawns, grading, and projects where you need a uniform soil base across a large area. Garden mix is a 50/50 blend of that topsoil and screened compost, with 9-0-5 organic fertilizer pre-mixed in. Garden mix is for planting beds, raised beds, and vegetable gardens specifically.
One Phone Call. One Delivery. One Spring.
Thirty years of Connecticut homeowners have started their vegetable gardens with a single truckload from our yard in Milford. The recipe hasn't changed because it doesn't need to. Order online, call us, or stop by the yard at 1183 Oronoque Road.